Ice and Water Shield for Roofing: Valleys vs. Metal Options
How to choose between ice & water shield for in valleys, or metal. Make the right decision for your roof with our guide!
Choosing Ice & Water Shield, or Metal Valleys
Key Highlights
- Ice and water shield, and metal roof valleys are both effective options for protecting vulnerable areas of your roof from unwanted moisture.
- Shield is a self-adhesive underlayment that provides an additional layer of protection, helping to prevent leaks in roof valleys.
- Metal valleys: valley flashings made of metal that direct water off of the roof and help prevent leaks and rot.
- When choosing between ice and water shield and metal valleys, factors such as climate, cost, and installation process should be considered.
- It's important to understand the science behind ice and water shield and the benefits of using it in roof valleys.
- Exploring metal valleys, including the different types and advantages, can help you make an informed decision.
Introduction
When it comes to protecting your roof from water damage, two popular options to consider are ice and water shield, and metal valleys. Both roofing materials are designed to prevent leaks and lengthen the life of your roof. However, choosing between the two can be a difficult decision, especially if you are not familiar with the HVAC industry. In this blog, we will discuss the key highlights of the ice and water shield and metal valleys. These key points include the installation process, survival and maintenance, cost analysis, climate considerations, common misconceptions, and of course some real-life application stories. By the end of this blog, you will have a better understanding of which option is best for your personal roofing needs.
Understanding Ice & Water Shield
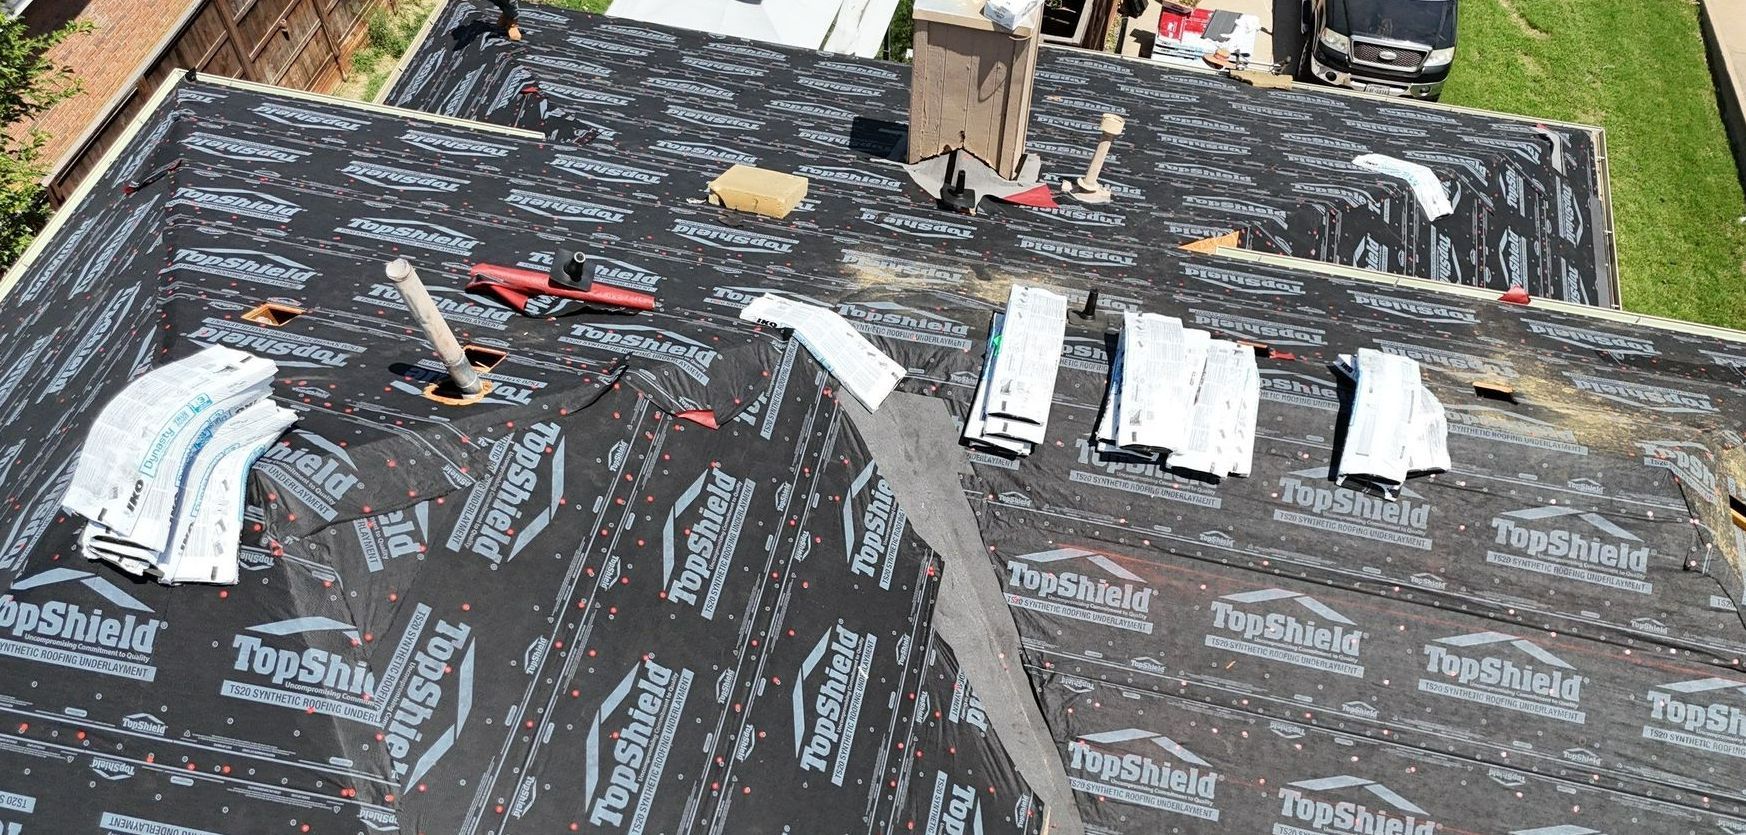
Before diving into the details, it's important to understand what exactly ice and water shield is. This product is a waterproof membrane specifically designed to protect vulnerable areas of roof decking from moisture damage. It is typically sold in rolls with a self-adhesive backing, making it easy to install. This material is commonly used in roof valleys, drip edges, and anywhere additional protection is needed, including the gutter. It acts as an underlayment that prevents damage to the roof decking, extending the life of the roof when properly installed under shingles or metal roofs.
Science Behind Ice & Water Shield Protection or Felt
The science behind ice and water shield lies in its construction. Unlike traditional roofing felt, which is a felt type commonly used as underlayment, this product is a self-adhesive material that adheres directly to the roof surface. This creates a watertight bond and prevents water from infiltrating the roof decking. The rubberized nature of ice and water shield makes it not only water-resistant but also highly pliable, allowing it to conform to the contours of the roof decking. This flexibility ensures that the material remains effective even in extreme weather conditions, where the commonly used felt may fail. By creating a barrier between the surface of a roof and potential water related damage, such as ice dams or heavy rain, the ice and water shield provides added protection. The additional peace of mind against tar and other damaging elements makes this product a crucial component to protect premium roof systems like slate and cedar shake, making it a better option than felt would be in many cases.
Benefits of Using Ice & Water Shield for Roofing in Valleys or Metal
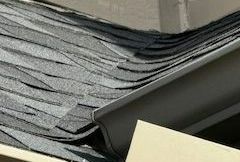
- Prevents water infiltration in vulnerable areas such as roof valleys, extending the life of the roofs material.
- Acts as an additional layer of protection, reducing the risk of leaks and water related damage.
- Self-adhesive backing ensures a watertight bond, creating a barrier to prevent water from seeping into the roof deck.
- Provides added protection against ice dams and heavy rain, common causes of water related damage in roof valleys.
Exploring Metal Valleys
In addition to ice and water shield, another option to consider for your roof valleys is metal valleys. Metal valleys, also known as valley flashings, are made of durable metal materials such as galvanized or aluminum. They are designed to direct water off of the roof and from vulnerable areas. Metal valleys are an attractive option for homeowners looking for long-lasting and visually appealing solution. They offer durability and are capable of withstanding extreme weather, making them a favored choice for a variety of roofing projects, especially those using materials such as cement or tile.
Metal Valley Types: Open vs. Closed
When considering metal valleys for your roof, it's important to understand the two main types: open valley and closed valley. An open valley is the most common type of metal valley and is made with shingles or tiles but not a metal sheet. An open valley allows water to pass through the gap between the two sides of the valley. On the other hand, a closed valley uses a metal sheet as the valley flashing, which prevents water from passing through. The choice between open and closed valley depends on factors such as aesthetics and the specific requirements of your roofing project.
Advantages of Installing Metal Valleys on Your Roof
- Metal valleys are highly durable and can withstand extreme weather conditions, making them a long-lasting solution for your roof.
- They provide an aesthetically pleasing finish to your roof, adding a touch of elegance to your home.
- Metal valleys offer superior protection against water damage and leaks, ensuring the longevity of your roof.
- They are compatible with a variety of roofing materials and can be customized to fit the specific needs of your project.
Installation Processes
When it comes to the installation process, there are some key differences between ice and water shield and metal valleys. Installing said product requires careful attention to detail, as it is a self-adhesive material that adheres directly to the roof surface. On the other hand, metal valleys are installed as valley flashings, which involves securing the metal flashing in place and ensuring proper waterproofing. The installation process for both options should be carried out by a professional to ensure proper sealing and protection.
How to Install Ice & Water Shield in Roof Valleys
When installing ice and water shield in roof valleys, it is important to follow proper installation techniques. The first step is to ensure a clean and dry surface of the roof. Next, apply the ice and water shield directly to the roof decking, ensuring a tight and secure bond. Overlap the rolls of the product by at least 4-6 inches to create a watertight barrier. It is also recommended to install a layer of underlayment over the ice and water shield for additional protection. This installation process should be carried out by a professional to ensure proper sealing and effectiveness of the ice and water shield.
Step-by-Step Guide to Installing Metal Valleys
Installing metal valleys requires careful attention to detail to ensure proper waterproofing and protection. Here is a step-by-step guide to installing metal valleys:
- Remove any existing valley material and clean the area.
- Measure the length of the valley and cut the metal flashing to fit.
- Install metal flashing by securing it to the roof deck, ensuring a tight fit and proper alignment.
- Use roofing screws or nails to secure metal flashing in place, ensuring a watertight bond.
- Install drip edge along the edges of metal valleys to provide additional protection and direct water away from vulnerable areas.
- Inspect the installation to ensure proper sealing and functionality.
It is recommended to hire a professional for the installation of metal valleys to ensure proper waterproofing and protection for your roof.
Durability & Maintenance
Durability and maintenance are important factors to consider when choosing between ice and water shield and metal valleys. Ice and water shield is known for its strength and ability to withstand extreme weather conditions. It requires minimal maintenance and provides long-lasting protection for your roof. Metal valleys, on the other hand, are also highly durable and can withstand the test of time. They require regular inspections to ensure there are no leaks or damage to the metal flashing. Proper maintenance and regular inspections will help extend the lifespan of both ice and water shield and metal valleys.
Longevity: Ice & Water Shield vs. Metal Valleys
When it comes to longevity, both options offer excellent protection for your roof. However, the lifespan of each option may vary. Ice and water shield typically has a lifespan of 20-30 years, depending on the quality of the material and the installation. Metal valleys, on the other hand, can last 30-50 years or even longer with proper maintenance. To give you a better understanding, here is a comparison of the longevity of each:
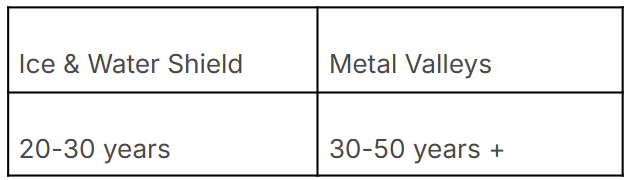
It's important to note that these lifespans are approximate and can vary depending on factors such as climate, installation quality, and maintenance.
Maintenance Tips: Comparing Options
Proper maintenance is crucial to ensure the longevity and effectiveness of both choices. Here are some maintenance tips for each option:
Ice & Water Shield:
- Regularly inspect roof valleys for any signs of damage or wear.
- Clear any debris or leaves that may accumulate in valleys to prevent clogging and water pooling.
- Ensure that the product is properly sealed and adhered to the roof decking.
- If any repairs or replacements are needed, hire a professional roofer to ensure proper sealing and effectiveness.
Metal Valleys:
- Regularly inspect the metal flashing for any signs of corrosion or damage.
- Clear any debris or leaves that may accumulate in valleys to prevent clogging and water pooling.
- Check for any loose or damaged fasteners and replace them if necessary.
- If any repairs or replacements are needed, consult a professional roofer for proper installation and sealing.
By following these maintenance tips, you can ensure the longevity and effectiveness of both ice and water shield, and metal valleys on your roof.
Cost Analysis
When it comes to choosing between these products, cost is an important factor to consider. Ice and water shield is generally more cost-effective compared to metal valleys, where price can vary depending on the size of your roof and the quality of the material. Metal valleys, on the other hand, can be more expensive due to the cost of the metal flashing and installation. It is best to consult with a professional roofer to get an accurate cost estimate for both options based on your specific roofing needs.
Initial Installation Cost Comparison
The initial installation costs of ice and water shield and metal valleys can vary depending on factors such as the size of your roof, the complexity of the project, and the location. Ice and water shield is generally more cost-effective compared to metal valleys. The cost of the product typically ranges from $0.50 to $1.50 per square foot, including materials and labor. On the other hand, the cost of installing metal valleys can range from $2.00 to $5.00 per linear foot, including materials and labor. It is important to get a detailed cost estimate from a professional roofer to accurately compare the installation costs of both options for your specific roofing project.
Long-Term Cost Benefits of Each Option
While the initial installation costs of ice and water shield and metal valleys may vary, it is important to consider the long-term cost benefits of each option. Ice and water shield provides excellent protection against water damage, which can help prevent costly repairs in the future. The long lifespan of metal valleys also contributes to their cost benefits, as they require minimal maintenance and can last for several decades. Additionally, both options can help improve the energy efficiency of your home, reducing long-term energy costs. By investing in high-quality roofing materials like ice and water shield or metal valleys, you can enjoy long-term cost savings and peace of mind knowing that your roof is protected.
Climate Considerations
When choosing between ice and water shield and metal valleys, it's important to consider the climate in which you live. Climate can play a significant role in the performance and effectiveness of these roofing materials. Ice and water shield is particularly beneficial in colder climates, where ice dams and heavy snowfall are common. It provides added protection against water infiltration and prolongs the life of the roof. Metal valleys, on the other hand, are suitable for various climates and can withstand extreme weather conditions. However, it is important to properly install metal valleys to avoid leaks caused by roofing nails penetrating the roofing paper. It's important to consult with a professional roofer to determine which option is best suited for your specific climate.
How Do Weather Conditions Affect Your Choice?
Weather conditions can have a significant impact on the choice between ice and water shield and metal valleys for your roof. In areas with colder climates and frequent snowfall, ice and water shield is highly recommended to prevent ice dams and water damage. The self-adhesive nature of ice and water shield ensures a watertight seal and provides added protection against harsh weather conditions. Metal valleys, on the other hand, are suitable for various weather conditions and can withstand extreme temperatures and heavy rain. The durable nature of metal valleys makes them an excellent choice for areas prone to severe weather conditions. Considering the weather conditions specific to your area will help you make an informed decision when choosing between these two options.
Best Practices: Cold vs. Warm Climates
Best practices for the installation and maintenance of ice and water shield and metal valleys can vary depending on whether you live in a cold or warm climate. In cold climates, where ice dams and heavy snowfall are common, it is important to ensure proper sealing and installation of ice and water shield to prevent water infiltration. Regular inspections and clearing of snow and ice buildup are also recommended. In warm climates, where heavy rain and high temperatures can be a challenge, metal valleys should be installed with proper waterproofing and corrosion-resistant materials. Regular inspections and clearing of debris are essential to maintain the effectiveness of metal valleys. Consulting with a professional roofer familiar with the specific weather conditions in your area will help you determine the best practices for your roofing project.
Common Misconceptions
There are common misconceptions surrounding both ice and water shield and metal valleys that can hinder the decision-making process. Some misconceptions include the belief that ice and water shield is only necessary in cold climates or that metal valleys are prone to leaks. It's important to separate fact from fiction and consider the specific benefits and limitations of each option. By understanding the facts and debunking these misconceptions, you can make an informed decision when choosing between ice and water shield and metal valleys for your roof.
Debunking Myths About Ice & Water Shield
Myth 1: Ice and water shield is only necessary in cold climates.
Fact: While ice and water shield is commonly used in cold climates to prevent ice dams and water damage, it is also beneficial in warm climates where heavy rain can be a challenge. Ice and water shield provides added protection in areas prone to water infiltration.
Myth 2: Ice and water shield can be installed by anyone.
Fact: Installing ice and water shield requires proper knowledge and techniques to ensure proper sealing and effectiveness. It is recommended to hire a professional roofer for the installation to avoid any potential issues.
Myth 3: Ice and water shield is not compatible with all types of roofing material.
Fact: Ice and water shield can be used with various types of roofing material, including asphalt, metal, and tile roofs. It provides added protection regardless of material used.
By debunking such myths, you are now able to make a more informed and educated decision when considering an ice and water shield for your roof.
Clearing Up Confusions Regarding Metal Valleys
Confusion 1: Metal valleys are prone to leaks.
Clarification: When installed properly and with the correct materials, metal valleys can provide excellent protection against leaks. Professional installation and regular inspections are key to ensuring the effectiveness of metal valleys.
Confusion 2: Metal valleys are not compatible with all types of roofing material.
Clarification: Metal valleys can be used with a variety of roofing materials, including asphalt, metal, and tile roofs. They are compatible with most roofing systems and can be customized to fit the specific needs of your project.
By clearing up these confusions, you can gain a better understanding of the benefits and limitations of metal valleys and make an informed decision for your roof.
Real-Life Application & Success Stories
Real-life application stories can provide valuable insights and experiences from homeowners who have chosen between ice and water shield and metal valleys for their roofs. These stories showcase the benefits, challenges, and overall satisfaction of using each option. By understanding the experiences of others, you can gain a better perspective on the effectiveness and suitability of ice and water shield and metal valleys for your own roofing needs.
Homeowners who have chosen to install ice and water shield on their roofs have reported success in preventing water damage and extending the life of their roofs. Success stories highlight the effectiveness of ice and water shield in protecting vulnerable areas, such as roof valleys, from leaks and water infiltration. Homeowners have expressed satisfaction with the durability and ease of installation of ice and water shield, as well as the peace of mind it provides. These success stories, along with the complete roof insulation guide for 2022, serve as a testament to the benefits and effectiveness of using ice and water shield for your new roof.
Conclusion
In conclusion, choosing between Ice and Water Shield and Metal Valleys depends on various factors like climate, cost, and maintenance. Understanding the benefits and installation processes of each option is crucial in making an informed decision for your roof. Consider longevity, durability, and weather conditions to ensure optimal protection. Debunk misconceptions and explore real-life application stories to gain insights into successful roofing solutions. By evaluating your specific needs and circumstances, you can select the most suitable roofing material that provides long-term reliability and performance.
Frequently Asked Questions
Can Ice & Water Shield be used with all shingle types?
Yes! Ice and water shield can be used with all types of shingles, including asphalt shingles. It provides an additional layer of protection and helps prevent leaks in vulnerable areas such as roof valleys. When installing ice and water shield with asphalt shingles, it is important to follow proper installation techniques to ensure a watertight bond and effectiveness.
Can Ice & Water Shield be used as a standalone roofing material, or is it typically combined with other products?
Ice and water shield is not typically used as a standalone roofing material. It is usually combined with other roofing materials for maximum protection and durability. When used in valleys or other vulnerable areas, it acts as an added layer of defense against water infiltration and ice dam formation.
Why Do Some Homeowners Prefer Metal Valleys?
Some homeowners prefer metal valleys for their roofs due to their durability, longevity, and aesthetic appeal. Metal valleys offer superior protection against water damage and can withstand extreme weather conditions. They provide a visually appealing finish to the roof, adding a touch of elegance to the overall appearance of the home. Homeowners appreciate the long lifespan of metal valleys, as they require minimal maintenance and can last for a long time. The compatibility of metal valleys with various roofing materials also makes them a versatile choice for homeowners. Personal preferences and specific roofing needs play a significant role in why some homeowners choose metal valleys with an underlay for their roofs.