Navigate Roofing Insurance Claims: A Guide to Actual Cash Value, Depreciation, and Roof Replacement in Fort Worth

January 29, 2024

A Guide to Actual Cash Value, Depreciation, and Roof Replacement in Fort Worth


Navigate Roofing Insurance Claims

Struggling to understand your roofing insurance claim in Fort Worth? Grasp the essentials of actual cash value, depreciation, and the payment process with our guide. Here, we decode the jargon and streamline your roof replacement journey, highlighting how these factors affect your wallet. Visit Becker Roofing and Exteriors for expert assistance, and discover additional insights through links to relevant articles here.


Key Takeaways

  • Understanding the terms Actual Cash Value, depreciation, and Replacement Cost Value is essential for making an informed roof insurance claim in Fort Worth.
  • The insurance payment process for roofing claims typically involves an initial ACV payment, the potential for additional funds through recoverable depreciation, and a final depreciation check after repairs are verified.
  • Maximizing your roof claim requires proper documentation, effective navigation of adjuster inspections, and partnership with a qualified roofing contractor who can provide expertise and support.


Deciphering Your Roof Insurance Claim

The world of roof insurance claims can sometimes resemble a labyrinth. Yet, with a clear understanding of the key components involved, the path becomes less intimidating. Insurance companies and their adjusters play a crucial role in the claims process, evaluating damage, calculating costs, and determining payouts. A reputable roofing contractor can serve as your ally, offering expertise and guidance to ensure a robust and comprehensive claim.

Grasping the terms Actual Cash Value (ACV), depreciation, and Replacement Cost Value (RCV) is a cornerstone of the insurance claim process. These terms play a vital role in determining how much you can claim for your damaged roof. Unfamiliar as they may seem, understanding them is easier than you think. Let’s delve into each of these terms in the following subsections.


Understanding Actual Cash Value (ACV)

Actual Cash Value (ACV) is the term used by insurance companies to refer to the current value of your roof, considering its age and wear. It’s like the market price of a pre-loved item. ACV is the depreciated value of your roof, meaning it’s the value of your roof in its current condition, considering its initial cost and the wear it has sustained over time. An actual cash value policy would cover the cost of your roof based on this calculation.

Grasping ACV is significant since it forms the basis of your initial payout.


Decoding Depreciation

Depreciation is a term you’ve probably heard in relation to the value of cars decreasing over time. Well, the same concept applies to roofs. As your roof ages and endures the onslaught of weather conditions, its value decreases or depreciates. This depreciation is considered when determining the ACV.

While depreciation might seem like a disadvantage, there’s a component of it, known as recoverable depreciation, which can unlock additional funds for you. More on that later!


The Role of Replacement Cost Value (RCV)

Replacement Cost Value (RCV), as the name suggests, is the complete cost to replace your damaged roof with a new one. Unlike ACV, RCV doesn’t account for depreciation. It covers the entire cost of a brand new roof, including labor and materials. So, if your insurance policy provides RCV coverage, you’re likely to receive a higher payout compared to an ACV policy.

Navigating your insurance claim can be a game-changer, especially when understanding that not all insurance companies use the same terms.


The Payment Process Simplified

With the jargon decoded, it’s time to dissect the payment process. It can be broken down into three key stages – the initial ACV payment, recoverable depreciation, and the final depreciation check. Comprehending each stage can pave the way for a smoother claims process.


Initial Payment – The ACV Check

The first payment you receive from your insurance company is the ACV check. This is determined after the insurance adjuster inspects your damaged roof and calculates the ACV. The ACV check covers the current value of your roof, minus your policy deductible.

Note that this check won’t cover the full replacement cost of your roof. But don’t worry, that’s where the next stage comes in.


Recoverable Depreciation – Unlocking Additional Funds

Recoverable depreciation is the magic key that can unlock additional funds for your roof replacement. But what is it? Simply put, it’s the difference between the ACV and the total replacement cost of your roof. Once your roof repairs are completed and verified, you can claim this amount from your insurance company.

It’s like a second wind that helps cover the remaining cost of your roof replacement.


Finalizing the Claim – The Depreciation Check

The third and final stage of the payment process is the depreciation check. This check covers the recoverable depreciation amount and finalizes your claim. Once you’ve completed the roof repairs and provided the necessary documentation, your insurance company will release this check.

It’s the final piece of the puzzle that brings your claim to a close.


Maximizing Your Roofing Claim in Fort Worth TX

Beyond comprehending the insurance claim process, knowing how to maximize your roofing claim can have a considerable impact. This involves proper documentation of the damage, navigating adjuster inspections effectively, and partnering with a qualified roofing contractor.

These three components can contribute to securing the best outcome from your roofing insurance claim.


Documentation Best Practices

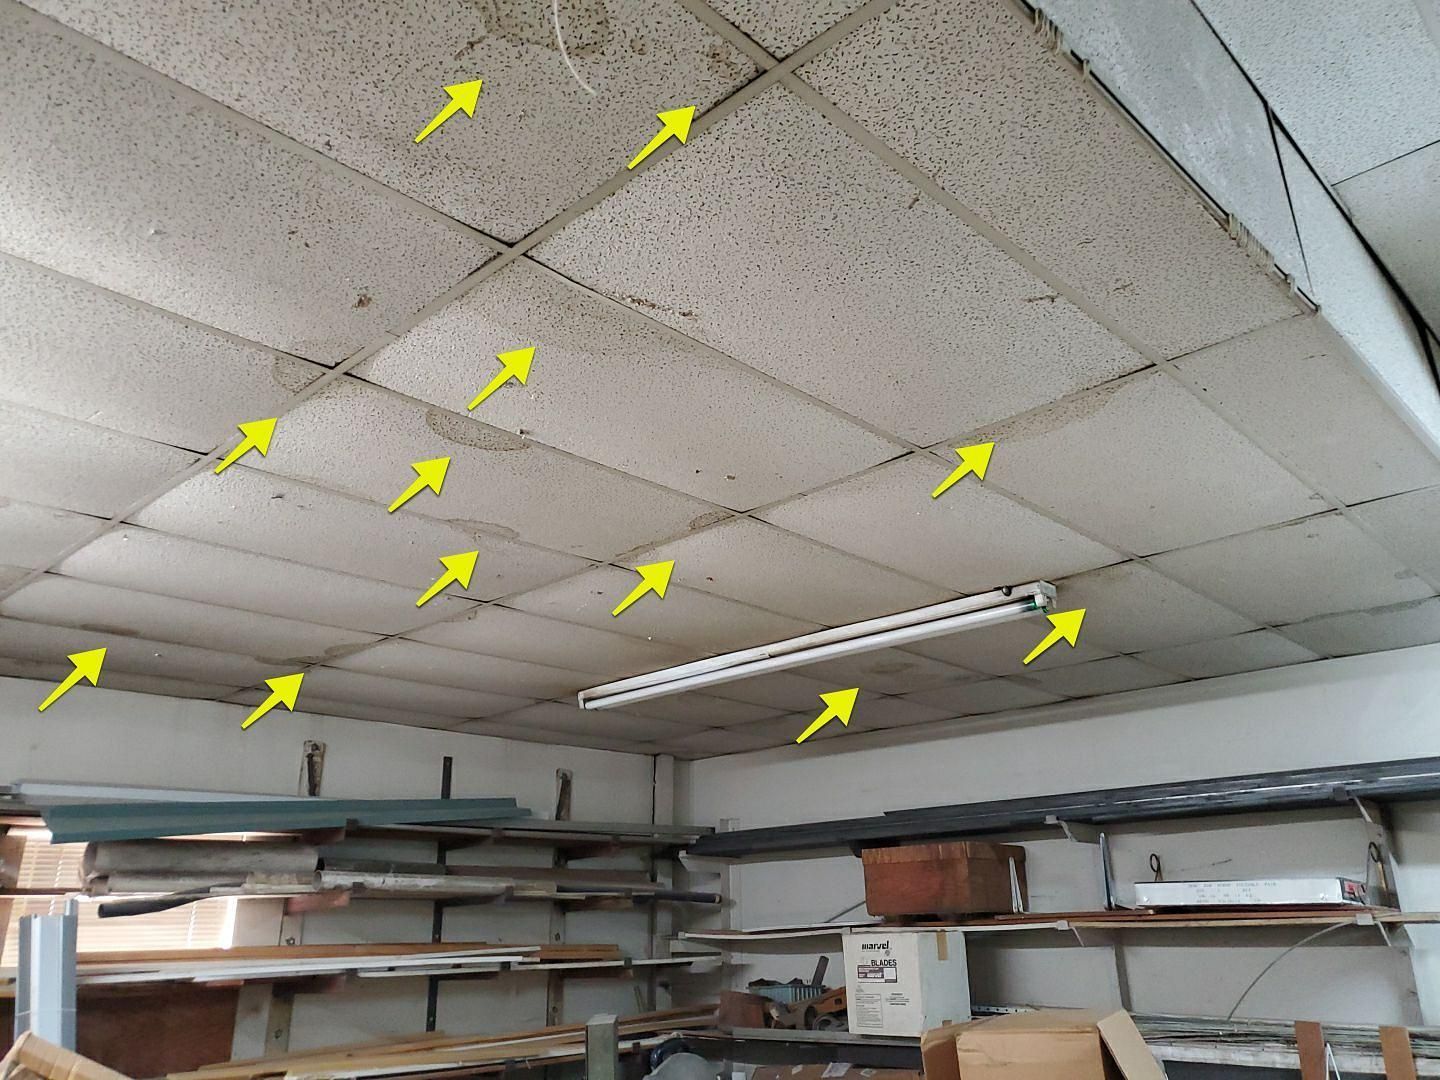
Proper documentation is the backbone of a successful insurance claim. It involves taking clear photographs and videos of the damage from multiple angles, making detailed written notes, and getting professional reports. A picture is worth a thousand words, and in the case of insurance claims, it can be worth thousands of dollars.


The more detailed and thorough your documentation, the stronger your claim.


Navigating Adjuster Inspections

An adjuster inspection is a critical part of the claims process. The adjuster’s role is to assess the damage and determine the payout amount. Understanding their process and what they’re looking for can help you navigate these inspections effectively.

It’s also a good idea to have your roofing contractor present during a free roof inspection to ensure nothing is overlooked.


Partnering with a Qualified Roofing Contractor

Last but not least, partnering with a reputable roofing contractor can be invaluable in maximizing your roofing claim. A qualified contractor can:

  • Provide expert advice
  • Help with documentation
  • Ensure quality repairs
  • Assist in negotiations with your insurance company
  • Address any issues that may arise during the claims process

In essence, they can be your ally and advocate, helping you navigate the claims process and achieve the best possible outcome.


Common Questions About Roof Insurance Payments

Having covered the basics, it’s time to tackle some common queries about roof insurance payments. These include:

  • Understanding the expected timeline for receiving payments
  • How policy specifics can affect your payout
  • How mortgage companies may influence the process.

By addressing these questions, we hope to provide further clarity and help you navigate the road to roof replacement with confidence.


Payment Timeline Expectations

One of the common questions homeowners have is regarding the timeline for receiving insurance payments. While the timeline can vary depending on several factors, insurers typically acknowledge a claim within 10 to 30 days and make a decision within up to 40 days after the adjuster’s inspection.

Knowing the expected timeline can help manage your expectations and prepare you for each stage.


Policy Specifics That Affect Payouts

Another common question surrounds how specific policy terms can affect the payout amount. Factors such as your policy’s deductible, the age of your roof, and the type of roofing material can significantly influence the amount you can claim. Comprehending these policy specifics can aid in navigating your claim effectively and maximizing your potential payout.


Involvement of Mortgage Companies

The involvement of mortgage companies is another aspect that can impact the payout process. If your property is mortgaged, your mortgage company may need to endorse the insurance checks and could hold the funds in an escrow account until the repairs are completed.

Knowing their role and requirements can lead to a smoother process and prevent unexpected hurdles.


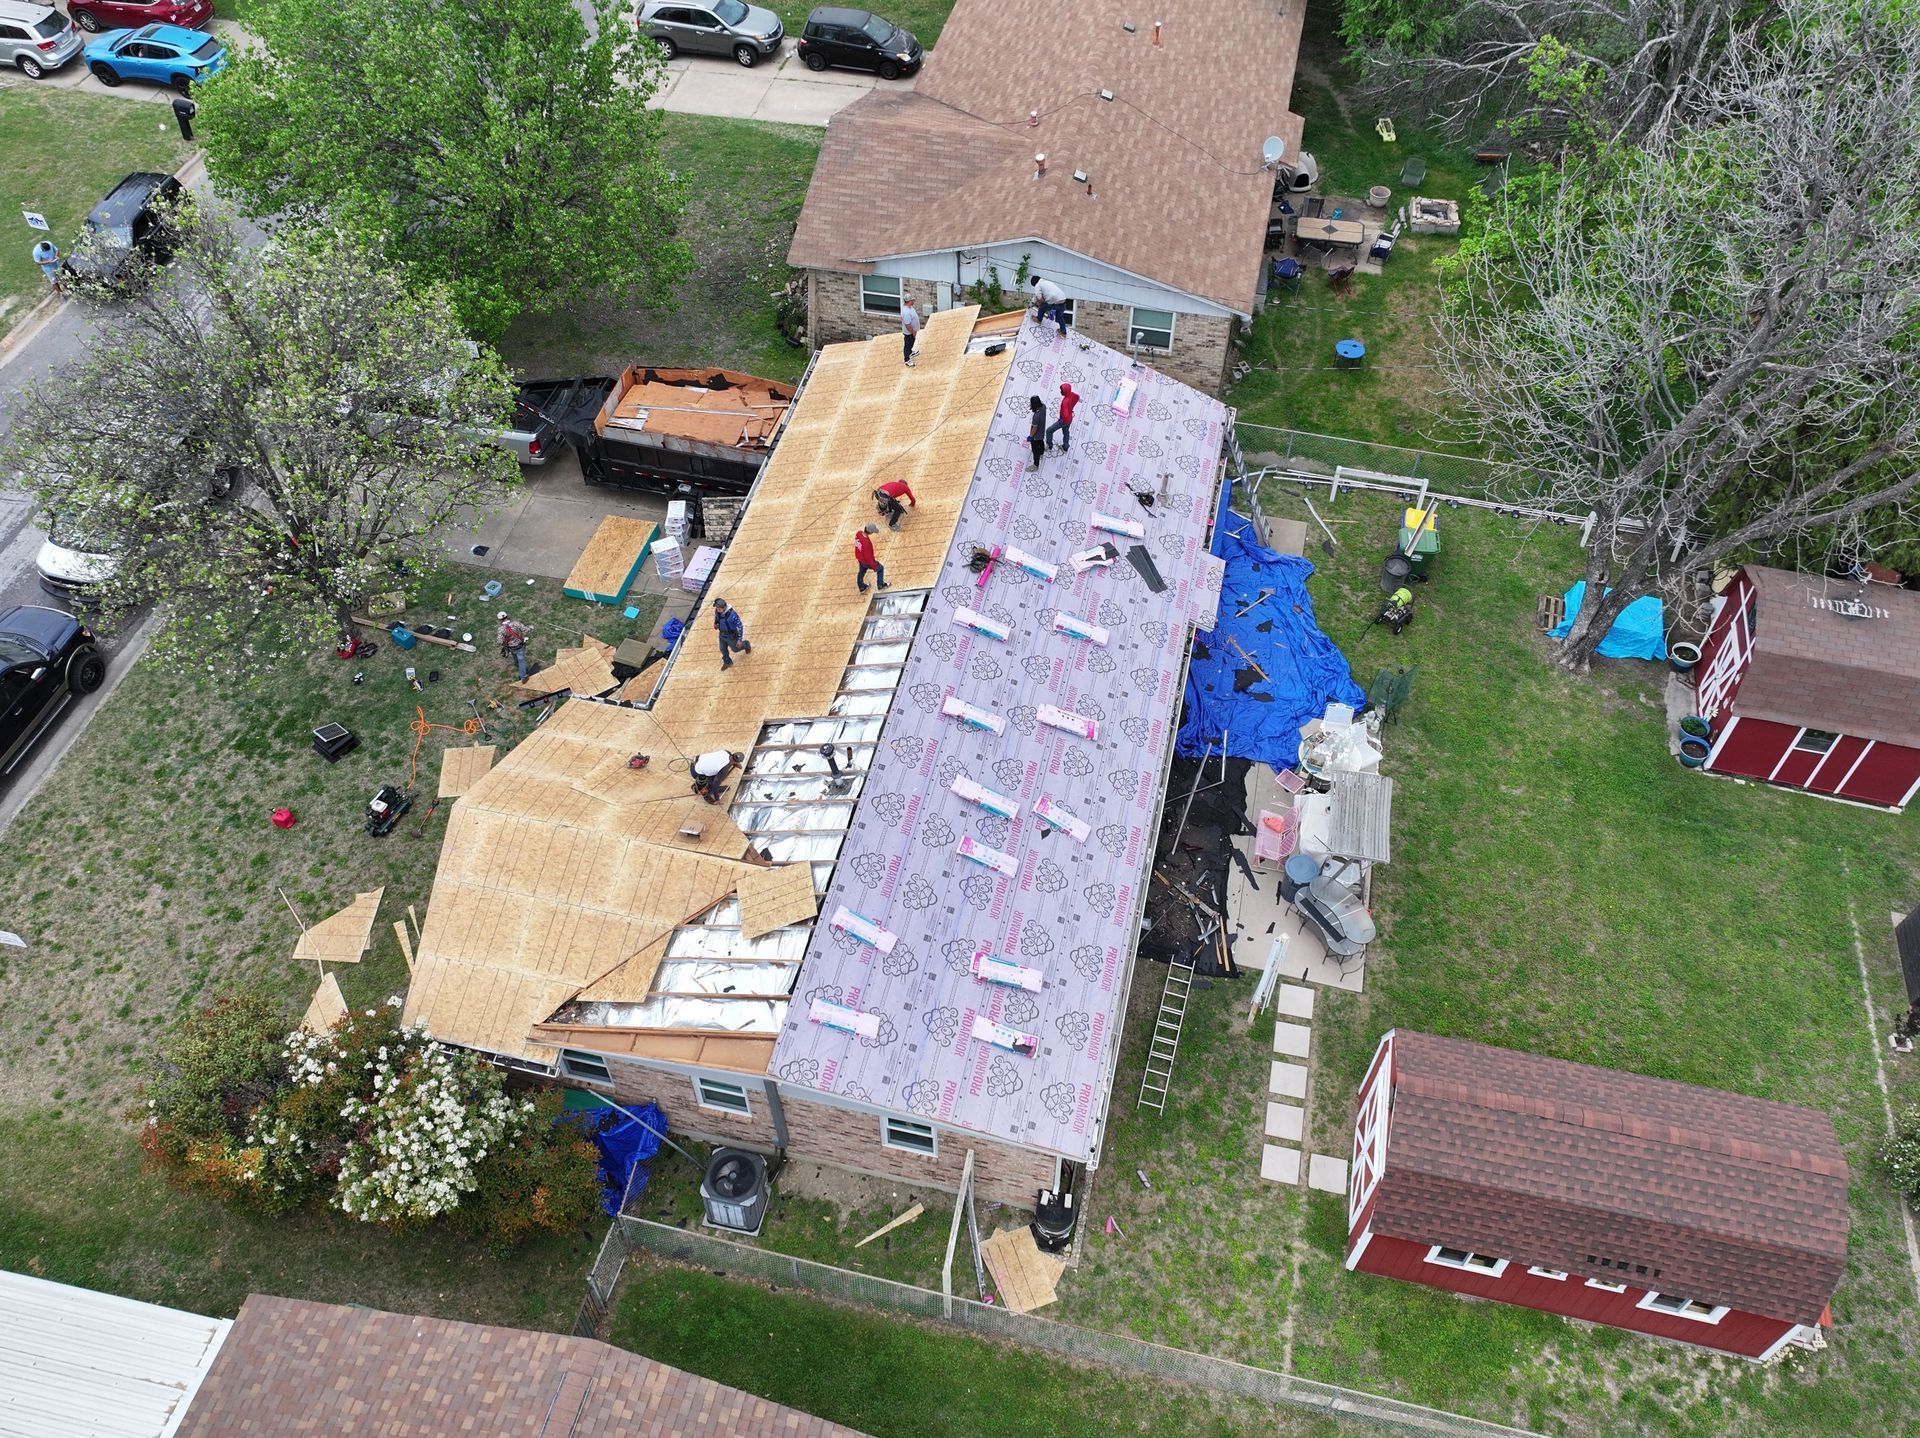
Preparing for Roof Replacement in Fort Worth

With the insurance claims process covered, we now focus on preparing for roof replacement. This involves selecting the right materials, understanding your warranty options, and coordinating with your roofing contractor. Each step is vital for a successful roof replacement and contributes to the lifespan and performance of your new roof.


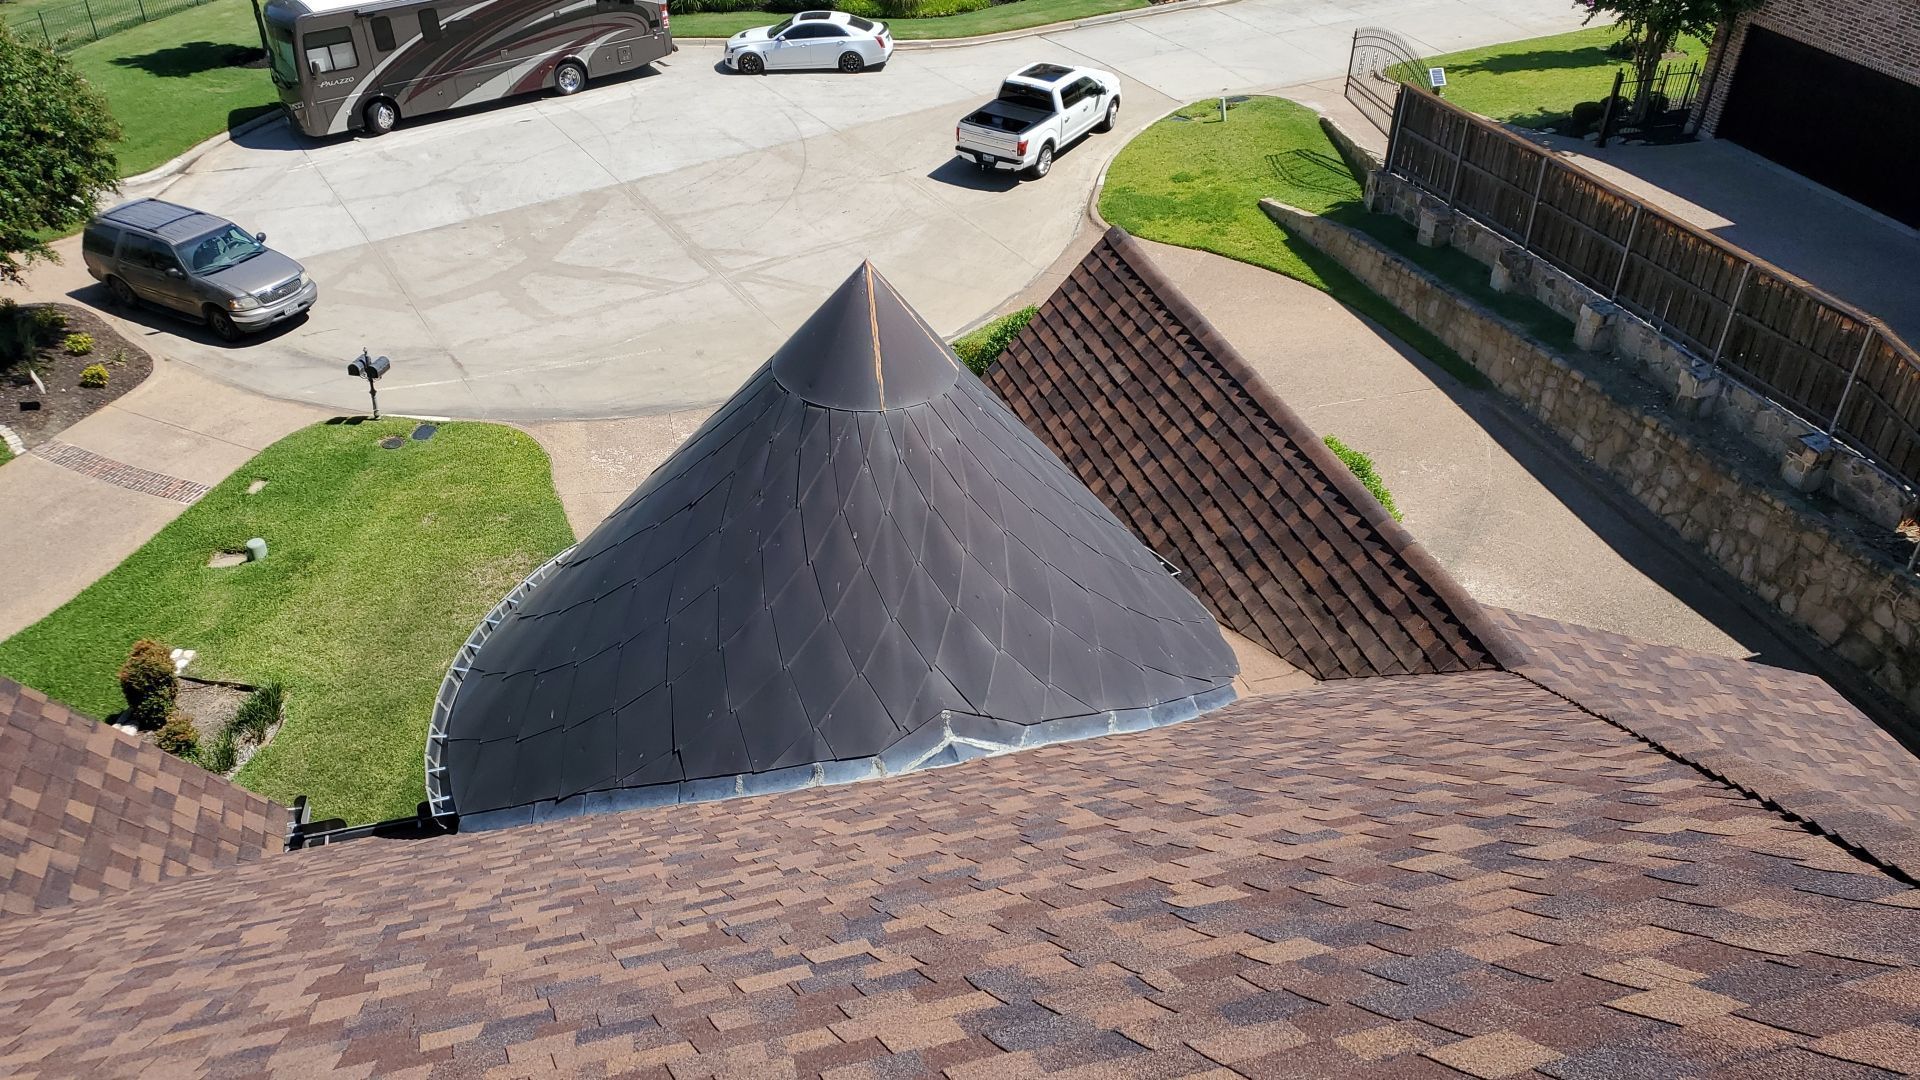
Selecting the Right Materials

The first step in preparing for roof replacement is selecting the right materials. The choice of materials will depend largely on the local climate and building codes in Fort Worth. From asphalt shingles to metal roofing, each material has its own pros and cons in terms of durability, energy efficiency, aesthetics, and cost.

Choosing the right material can make a significant difference in the longevity and performance of your new roof.


Understanding Warranty Options

Another key aspect of roof replacement is understanding your warranty options. Warranties can protect you from unforeseen costs and provide peace of mind. There are generally two types of warranties - manufacturer’s warranties that cover the materials and workmanship warranties that cover the installation. Understanding the coverage and limitations of each can help you make an informed decision and ensure you’re adequately protected.


Coordinating with Your Roofing Contractor

Finally, coordinating with your roofing contractor is essential for a smooth roof replacement process. Your contractor can:

  • Provide expert advice
  • Help with material selection
  • Ensure quality installation
  • Assist with documentation
  • Liaise with your insurance company

This will make the process less stressful for you.

Having a trusted and experienced contractor by your side can make all the difference in your roof repair or replacement journey.


Fort Worth Roof Replacement Resources

As we wrap up our guide, we’d like to leave you with some useful resources for roof replacement in Fort Worth. These include:

  • Information on local building codes and permits
  • Recommendations for quality material suppliers
  • Reviews and recommendations of reputable roofing contractors

These resources can provide valuable guidance and help you make informed decisions throughout your roof replacement journey.


Local Building Codes and Permits

Understanding local building codes and permit requirements is crucial when planning a roof replacement. These codes ensure the safety and integrity of your new roof and non-compliance can result in fines or penalties.

In Fort Worth, permits are required for roof replacement if the repair exceeds 500 square feet. You can find more information on these codes and requirements in the Fort Worth Development Services’ Roofing FAQ and Building Energy Codes.


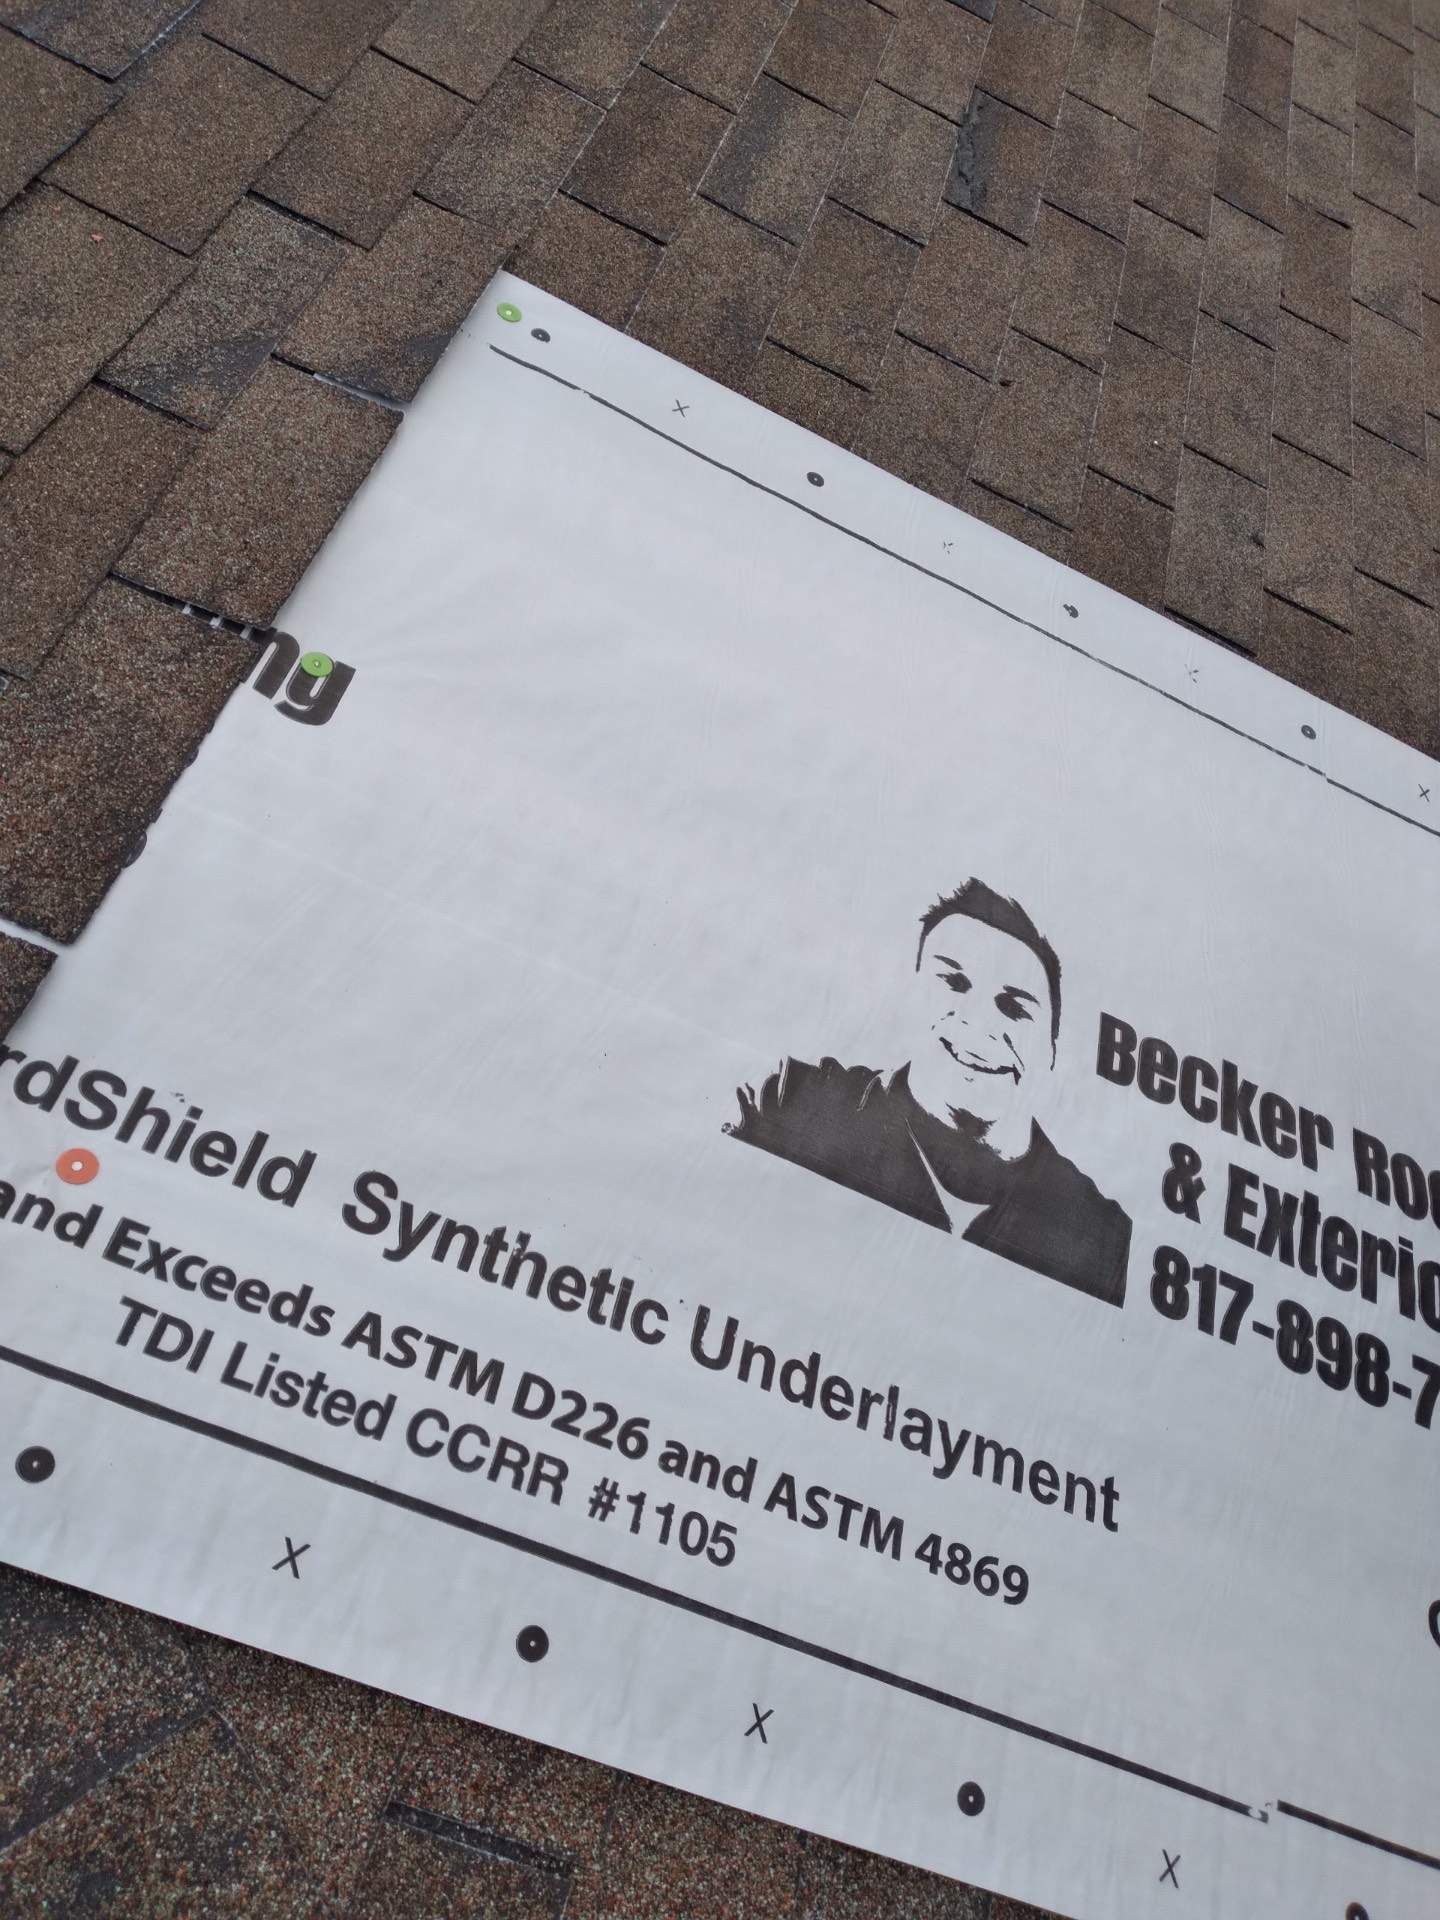
Finding Quality Material Suppliers

Choosing quality materials is key to a durable and long-lasting roof. There are several reputable roofing material suppliers in Fort Worth that offer a wide range of options to suit your needs and budget. Some of the popular roofing materials available include:

  • Asphalt shingles
  • Metal roofing
  • Clay tiles
  • Slate tiles
  • Wood shakes

These suppliers offer quality products backed by strong warranties.

Be sure to research and compare your options before making a decision.


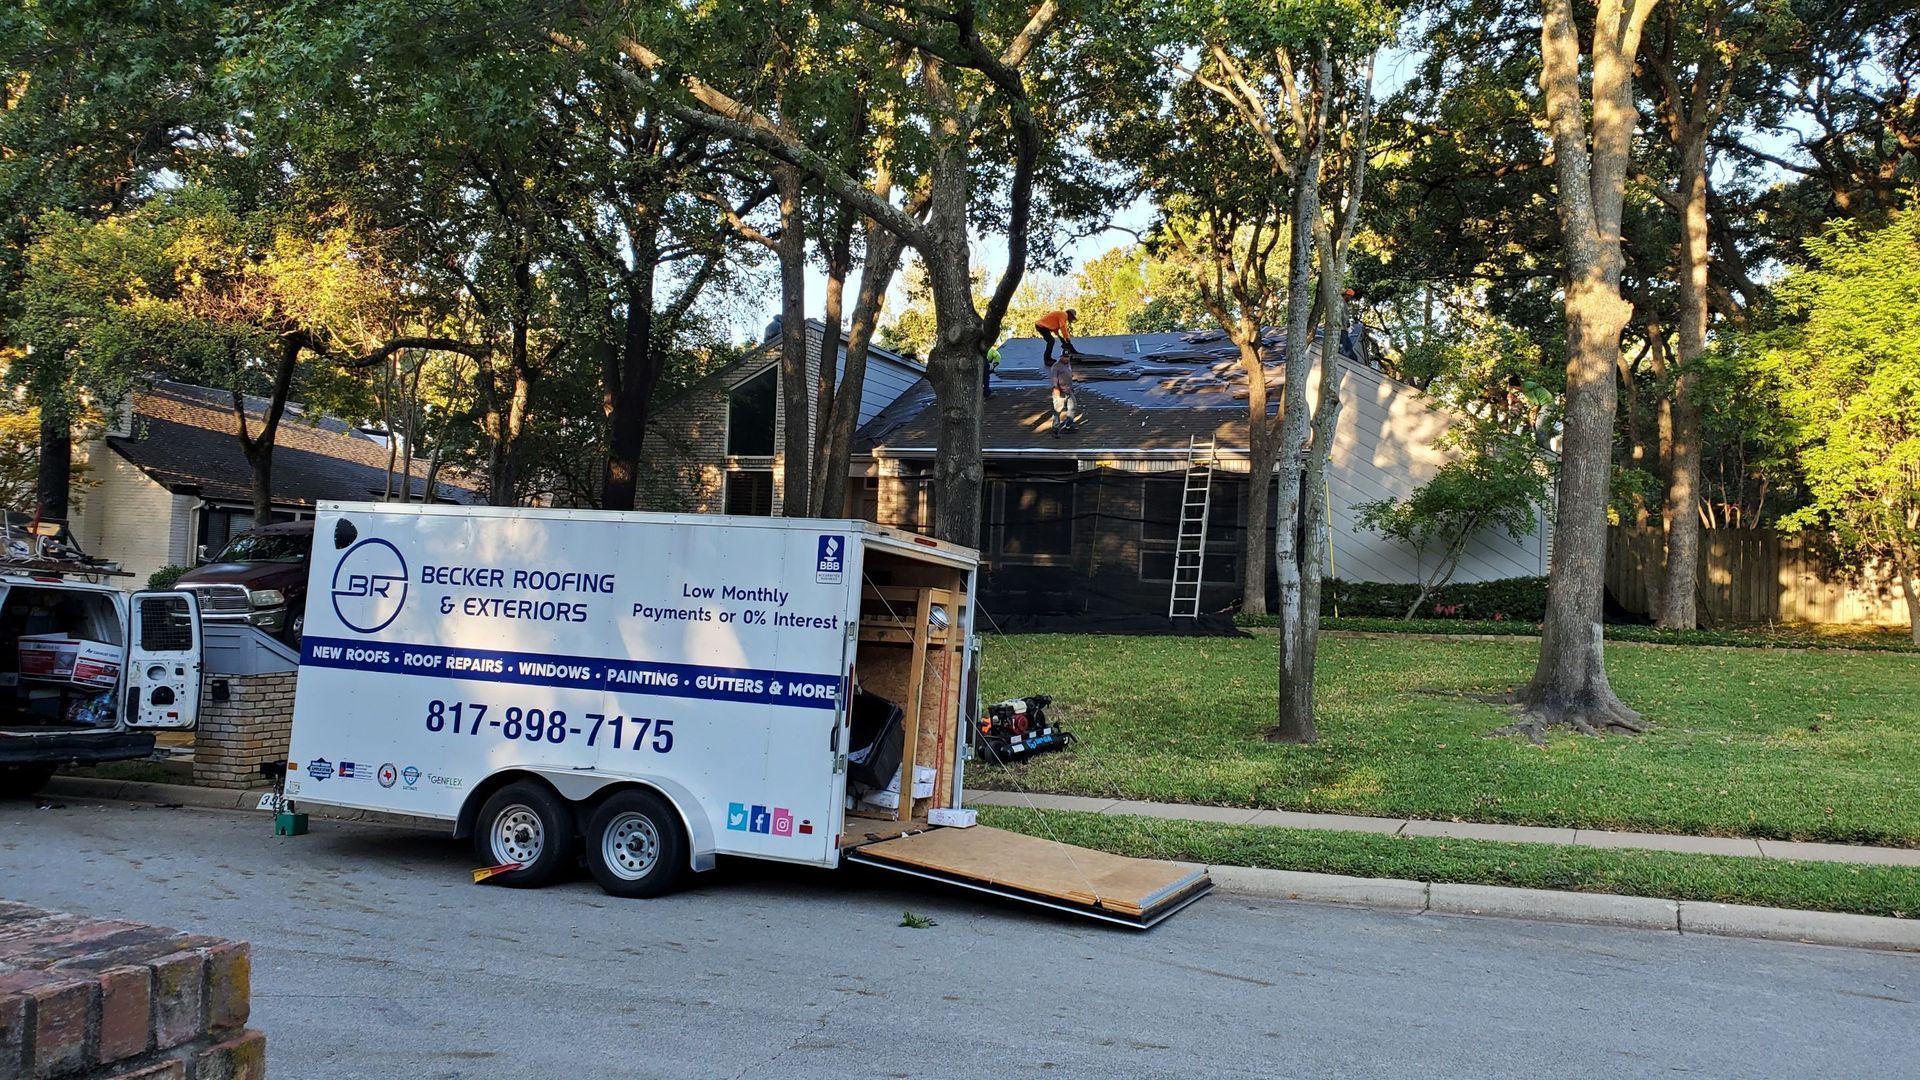
Reviews and Recommendations

Lastly, reviews and recommendations serve as useful tools when choosing a roofing contractor. A reputable contractor like Becker Roofing and Exteriors can provide expert advice, quality workmanship, and assist throughout the insurance claims process. Look for contractors with positive reviews, a solid track record, and a commitment to customer satisfaction.


Summary

Navigating roof insurance claims and preparing for roof replacement may seem daunting, but with the right knowledge and resources, it can be a smooth and manageable process. From understanding key insurance terms and the payment process to maximizing your claim and coordinating with a reputable contractor, we hope this guide has provided useful insights and guidance. Remember, understanding your insurance policy, partnering with a trusted roofing contractor, and making informed decisions can make all the difference in your roof replacement journey.


Frequently Asked Questions

How do you read an insurance claim for a roof?

To read an insurance claim for a roof, you should look for the claim summary, which details the restoration cost, calculated depreciation, replacement cost value, and projected lifespan of the roof. Understanding these factors will help you assess the coverage and plan for repairs.

What does roof actual cash value loss settlement endorsement mean?

An ACV loss settlement endorsement for your roof means your insurance provider will reimburse you for the current value of your roof, minus the deductible and depreciation. This is based on the condition of your roof at the time of the covered loss.

How do I make a successful roof leak insurance claim?

To make a successful roof leak insurance claim, first assess the damage, check your insurance coverage, document the damage, and then contact your insurer and a local roofing company for assistance. Stay in communication with your insurer and provide all necessary documentation.

What is Actual Cash Value (ACV) in roof insurance claims?

Actual Cash Value (ACV) in roof insurance claims is the depreciated value of your roof, taking into account its age and wear, and forms the basis of the initial payout from your insurance company.

What is recoverable depreciation?

Recoverable depreciation is the amount you can claim from your insurance company, which is the difference between the actual cash value (ACV) and the total replacement cost of your roof. It is claimed after your roof repairs are completed and verified.


By 7064529413 January 15, 2026
Understanding Roofing Shingle Blistering in North Texas Key Highlights Shingle blisters are bubble-like bumps on your roof caused by trapped heat or moisture. Poor ventilation in your attic is a leading cause of blistering on asphalt shingles. The intense North Texas heat can speed up the process, causing premature granule loss. While blistering can be a cosmetic issue, popped blisters expose your roofing system to UV and water damage. Regular inspections can help you decide between minor repairs and a full roof replacement. Distinguishing between blisters and hail damage is crucial for insurance and repair purposes. Introduction Have you noticed strange, bubble-like bumps on your roof? This is known as roofing shingle blistering, a common issue for homeowners in North Texas. The relentless sun and high temperatures can cause these blisters to appear, even on newer roofs with what seems like good attic ventilation. If you're in the Keller or Fort Worth area, understanding what causes these blisters is the first step toward protecting your home. This guide explains what you need to know about this potential issue. What Are Shingle Blisters on Roofs? Shingle blisters are essentially bubbles that form on the surface of asphalt shingles. This happens when air, gas, or moisture gets trapped inside the shingle material. As the sun heats your roof, this trapped substance expands, creating a raised blister. You might see these pop up within the first year after a new roof installation. While they might seem small, they can impact the health of your entire roofing system. Once these asphalt shingle blisters pop, they leave behind a pockmark. The protective granules that cover the shingle are knocked loose, exposing the raw asphalt underneath. This loss of granules is a key sign of blistering and can leave your roof’s surface vulnerable to the elements. The problem is often linked to issues in the manufacturing process or, more commonly, how your roof handles heat and moisture. Common Signs of Roofing Shingles Bubbling Recognizing bubbling shingles early can help you prevent bigger problems. The most obvious sign is the appearance of small, raised bumps or bubbles on your shingles. These can look like pimples on your roof’s surface. When a blister pops, it leaves behind a distinct mark. You'll notice a small crater or pockmark where the bubble used to be. This is often accompanied by granule loss in that specific spot, which can make the shingle look 'bald' in that area. Over time, these spots can compromise your roof's lifespan. During routine maintenance, look for these key signs of damage: Small, raised bubbles scattered across the shingles. Pockmarks or small craters on the shingle surface. Missing granules in concentrated spots. Bare patches that expose the underlying asphalt. How Shingle Blisters Form and What They Look Like Shingle blisters develop from the inside out. Asphalt shingles are made of several layers, and sometimes moisture or gasses can get trapped between them. This can happen due to incorrect mixtures during manufacturing or from moisture absorbed on-site. When your roof gets hot from the sun or from a poorly ventilated attic, that trapped moisture or gas heats up and expands. It has nowhere to go, so it pushes the top layer of the shingle outward, forming a bubble-like blister. This is why proper ventilation is so important—it helps prevent the roof from overheating to this point. Visually, these blisters look like small bumps on your shingles. If they haven't popped, they will feel solid. Once they burst, they leave a pockmark that reveals the shingle mat underneath. This premature deterioration can be a serious concern if it happens across a large area of your roof. Roof Blistering Causes in North Texas In North Texas, several factors contribute to roof blistering. Our climate plays a significant role, but issues within the roof system itself are often the main culprits. It's not just about the shingles; it's about how the entire system works together to manage heat and moisture. Understanding these causes can help you identify potential issues with your own roof. Let’s look at how the intense Texas heat and problems with attic ventilation can lead to an outbreak of blisters on your shingles. The Impact of Extreme Texas Heat on Shingle Lifespan The excessive heat we experience in North Texas is tough on roofing materials. Shingles are designed to handle direct sunlight, but constant high temperatures can push them to their limit. This heat can cause the asphalt in the shingles to release small amounts of gas. When this gas gets trapped within the shingle, it forms blisters. The relentless sun and high UV exposure also break down the shingle's protective layers over time. This UV damage weakens the shingles and makes them more susceptible to blistering and other forms of premature deterioration. Ultimately, extreme heat shortens your roof's lifespan. Even high-quality shingles can struggle if they are constantly overheating. This is why you might see blistering appear on a relatively new roof in our climate, making regular inspections a necessity. Poor Attic Ventilation and Moisture Trapping One of the most common causes of shingle blistering is poor attic ventilation. Your attic needs to breathe. If it can't release hot air effectively, the space overheats, which in turn heats the roof decking from below. Your shingles are then being baked from both above by the sun and below by the attic. This double-sided heat attack is a recipe for blisters. The trapped heat causes the shingles to reach a temperature where the asphalt begins to release gas, forming those tell-tale bubbles. Moisture trapping is another result of poor ventilation. Humidity rising from your home can get stuck in the attic, seep into the roof underlayment, and contribute to blistering. Proper installation of a ventilation system is crucial. Without adequate airflow, you create an environment that encourages premature shingle aging and damage, no matter how good your shingles are. Asphalt Shingles vs. Other Roofing Types: Who’s Most at Risk? While several roofing materials can blister, some are more vulnerable than others. An asphalt shingle roof is particularly susceptible to blistering due to its composition and layered construction. The way asphalt shingles are manufactured and how they react to heat makes them a prime candidate for this type of damage. In contrast, materials like metal or tile do not blister at all. Other roofing types, such as those used on commercial roofs like built-up or modified bitumen systems, can also develop blisters. However, the causes are often related to specific installation errors rather than a combination of heat and ventilation issues. Here is a quick comparison of how different roofing materials are affected: Roofing Type Blistering Risk & Cause Asphalt Shingles High risk due to trapped moisture/gas, poor ventilation, and heat. Built-Up Roofing Moderate risk, often caused by installation errors or aging. Modified Bitumen Moderate risk, typically from improper installation techniques. Metal, Tile, or Slate No risk of blistering due to the nature of the material. Why Asphalt Shingles Blister More Frequently Asphalt shingle blisters occur more often because of the materials used and the manufacturing process. Shingles are made from a mix of shingle ingredients, including asphalt, a fiberglass mat, and protective granules. If moisture gets trapped between these layers during production, it creates a weak spot. When these shingles are installed on a roof and exposed to the sun, the trapped moisture heats up, turns to vapor, and pushes its way out, forming a blister. This is especially true if the roof has poor ventilation, which superheats the roof's surface and accelerates the process. While modern manufacturing uses automated equipment to create more consistent products, errors can still happen. A bad batch with an incorrect mixture or trapped moisture can lead to widespread blistering soon after installation, highlighting the vulnerability of this specific roofing material. Do All Roofing Shingles Get Blisters? Not all roofing materials are prone to blistering. Shingle blistering is a problem primarily associated with asphalt-based products. Materials like wood, slate, tile, or metal do not have the layered, asphalt-based composition that allows blisters to form. Their solid structure doesn't trap gasses or moisture in the same way. However, among asphalt-based roofing, blistering can occur in different types. This includes traditional 3-tab shingles and architectural shingles. Even flat roofing systems like built-up roofing (BUR) and modified bitumen can blister, though the causes are usually tied to installation mistakes, such as applying materials at the wrong temperature. For residential homes, the focus is almost always on the surface of asphalt shingles. The combination of a fiberglass mat, asphalt, and protective granules creates the perfect environment for blistering if heat and moisture are not properly managed by the roof system. Telling the Difference Between Shingle Blisters and Hail Damage After a storm, it can be tricky to tell if the marks on your roof are shingle blisters or hail damage. They can look similar to the untrained eye, but they are very different problems with different solutions. Hail damage is caused by impact, while blistering is caused by heat and moisture from within the shingle. Knowing the difference is important, especially when it comes to insurance claims and deciding whether you need a simple repair or a full roof replacement. Let's explore the visual clues that can help you distinguish between these two potential issues. Visual Clues for Identifying Each Problem When you conduct a visual inspection, the key difference is how the granules look. Hail strikes knock the granules into the shingle, leaving an indentation. Blisters, on the other hand, push the granules off completely when they pop. Hail damage feels soft or bruised to the touch, like a dent in a car. A popped blister will have a hard crater with exposed asphalt. Also, consider the pattern. Hail damage is random, while blistering can sometimes appear in more uniform patches, especially on sun-facing slopes of the roof. Here are some clues to help you tell them apart: Blisters: No granules left in the pockmark; feels hard. Hail Damage: Granules are still visible but pushed into the dent; feels soft. Blisters: Can appear without a storm. Hail Damage: Occurs only after a hailstorm. Blisters: Are primarily a cosmetic issue until they pop, causing no immediate structural harm. When to Call a Keller or Fort Worth Roofing Expert If you see what you think are blisters on your roof, it's a good idea to call a professional. While a few unpopped blisters may not be an emergency, they can signal underlying potential issues like poor ventilation that need to be addressed. A roofing expert can determine the severity of the problem. A professional from a trusted roofing company like Becker Roofing and Exteriors can perform a thorough inspection. We can tell you for sure if you're dealing with blistering, hail damage, or another issue. This is especially important if you notice widespread blistering or many popped blisters, as this can accelerate the need for a new roof. Don't wait for a leak to appear. If you're in Keller, Fort Worth, or the surrounding areas, scheduling regular roof inspections is the best way to catch problems early. For exceptional roofing solutions and an honest assessment, visit us at www.brexteriors.com to schedule your inspection. How to Prevent Roofing Shingle Blistering The good news is that you can take steps to prevent or minimize shingle blistering. Prevention focuses on two key areas: ensuring your roof system functions correctly and choosing the right materials from the start. Following best practices can significantly extend your roof’s lifespan and keep it looking great. From routine maintenance to making smart choices during a roof replacement, there are effective strategies to protect your investment. Here are some tips on how to keep your North Texas roof healthy and blister-free. Best Maintenance Tips for North Texas Homes Regular maintenance is your first line of defense against roofing problems. By catching potential issues early, you can prevent them from turning into costly repairs. For homes in North Texas, this means paying close attention to how your roof handles our intense climate. Avoiding unnecessary foot traffic is a simple but effective tip. Walking on your roof, especially on a hot day, can cause blisters to pop and can dislodge granules. It's always best to leave inspections to professionals who know how to navigate a roof safely without causing damage. To ensure the longevity of your roof, follow these maintenance tips: Schedule professional regular inspections, at least once a year or after major storms. Keep your gutters clean to ensure proper water drainage away from the roof. Trim overhanging tree branches to prevent debris buildup and moisture trapping. Check your attic for signs of poor ventilation, like excessive heat or moisture. Choosing Products and Installers to Minimize Blisters Preventing blisters starts with choosing quality shingles from reputable manufacturers. Brands like GAF and Owens Corning are known for their quality control, which reduces the risk of defects that can lead to blistering. Investing in a better product upfront can save you headaches down the road. However, even the best shingles will fail if not installed correctly. Proper installation is critical. An experienced contractor will ensure your entire roofing system, including ventilation and underlayment, is set up according to industry best practices. This is your best defense against heat and moisture buildup. When it's time for a new roof, do your research. Hire a certified and trusted installer like Becker Roofing and Exteriors who understands the specific challenges of the North Texas climate. A professional installation is key to a long-lasting, blister-free roof. What To Do If You Spot Blistering on Your Roof Discovering shingle blisters on your roof can be concerning, but don't panic. The first step is to assess the situation without causing more harm. Your immediate actions can help determine whether the issue requires a simple fix or a more significant repair or replacement. It’s important to understand the extent of the damage before making any decisions. A professional roof inspection is the most reliable way to figure out the severity of the blistering. An expert can evaluate the affected area, identify the root cause, and recommend the best course of action. Whether it's monitoring the blisters, performing a localized repair, or planning for a future replacement, getting a clear diagnosis is key. Immediate Steps Homeowners Should Take If you notice blistering, the most important thing to do is avoid walking on the roof. Foot traffic can pop the blisters, causing granule loss and exposing the shingle to UV rays and water. This can turn a minor cosmetic issue into a real problem. Instead, document what you see from the ground or a safe vantage point. Take clear pictures of the affected area. This documentation will be helpful when you speak with a roofing company and can provide a baseline for monitoring the issue over time. Here are the immediate steps you should take: Do not walk on the roof or try to pop the blisters yourself. Take photos of the blisters from the ground if possible. Call a professional roofing company for a thorough roof inspection. Check your attic for signs of high heat or moisture, which could be the cause. Review your roof's warranty information to see if manufacturing defects are covered. Repair, Replace, or Monitor? How to Decide The decision to repair, replace, or simply monitor your blistered shingles depends on the severity and extent of the problem. If you only have a few small, unpopped blisters, your roofer may recommend you just monitor them. In many cases, unpopped blisters don't pose an immediate threat to your roof's integrity. A repair may be the right choice if the blistering is confined to a small area and some of the blisters have popped. A professional can replace the individual damaged shingles to prevent further issues. However, if the blistering is widespread across an entire slope, a full roof replacement might be the most cost-effective solution in the long run. Ultimately, the decision should be guided by a professional assessment. A roofer can identify if there are underlying structural issues or severe ventilation problems that need to be addressed. This will help you choose the best path forward for the health of your roof. The Effects of Shingle Blistering on Roof Performance and Insurance Shingle blistering doesn't just affect how your roof looks; it can impact its performance and even your homeowner's insurance. Popped blisters can lead to premature deterioration, leaving your roof vulnerable to leaks and water damage. Understanding these risks is key to protecting your home. Furthermore, how your insurance company views shingle blistering is important. Unlike storm damage, blistering is often treated differently in policies. Let's examine how this issue can affect your roof's integrity and what to expect from your insurance coverage. Does Blistering Lead to Leaks or Bigger Problems? A few unpopped blisters are unlikely to cause leaks. The real trouble starts when the blisters pop. When a blister bursts, it strips away the protective granules, exposing the raw asphalt layer of the shingle. This exposed area is now vulnerable to the elements. Over time, UV rays from the sun will break down the exposed asphalt, making it brittle and prone to cracking. This is when water damage becomes a real risk. Water can find its way into these cracks, leading to leaks that can damage your attic, ceilings, and walls. Widespread popped blisters significantly shorten the life of your roof. What starts as a small cosmetic flaw can escalate into a major failure of your roof system if left unaddressed, compromising its ability to protect your home. Will Your Homeowner’s Policy Cover Shingle Blisters? In most cases, your homeowner's policy will not cover damage from shingle blisters. Insurance is designed to cover sudden and accidental events, like hail or wind damage. Shingle blistering, on the other hand, is typically considered a maintenance issue or a manufacturing defect. An insurance company will likely argue that the blistering is a result of wear and tear, poor attic ventilation, or a flaw in the shingles themselves—none of which are covered events. Manufacturer warranties might cover blistering if it's proven to be a defect, but they often require evidence of an active leak. Because of this, you can't rely on your insurance to pay for a roof replacement due to blistering. This makes preventative maintenance and professional inspections even more important. If you suspect you have both blistering and hail damage, a roofer can help you distinguish between the two for your claim. Conclusion In conclusion, understanding roofing shingle blistering is vital for homeowners in North Texas. The region's extreme heat and humidity can lead to premature blistering of asphalt shingles, which affects your roof's performance and longevity. By recognizing the signs of blistering early and taking proactive measures, you can mitigate potential damage and protect your investment. If you've noticed bubbling or blistering on your roof, don't hesitate to seek professional assistance. Our team at Becker Roofing and Exteriors is here to help you assess the condition of your roof and provide the best solutions. For expert guidance and inspection, visit us at www.brexteriors.com today! Frequently Asked Questions Can roofing shingle blistering be fixed without full replacement? Yes, if the blistering is limited to a small, affected area, a roofing company can often perform a repair by replacing only the damaged shingles. However, if the issue is widespread or caused by a fundamental problem like poor ventilation, a full roof replacement might be a more effective long-term solution.  Are certain weather patterns making roof blisters worse in Texas? Absolutely. The extreme weather events in Texas, particularly the excessive heat and intense, direct sunlight, accelerate the formation of asphalt shingle blisters. This constant exposure to high temperatures and UV damage can cause shingles to deteriorate prematurely, making blistering a more common problem here than in cooler climates. Is it urgent to repair blistered shingles, or can I wait? While unpopped shingle blisters are not an immediate emergency, you shouldn't ignore them. Once blisters pop, they expose your roof system to the elements, which can lead to additional damage. It's best to have them inspected to protect the life of your roof and prevent a small issue from becoming a costly roof replacement.
By 7064529413 December 8, 2025
Understanding Fort Worth Hail Damage: HVAC Claims Process
October 28, 2025
Key Highlights Here’s a quick look at what you need to know about roof replacement involving solar panels: A roof replacement on a home with solar panels requires specialized expertise to protect your investment. The process involves safe removal, storage, and reinstallation of your solar panels by a qualified team. For Keller homeowners, addressing roof issues promptly is key to maintaining your home's integrity and your solar energy system's efficiency. Hiring a contractor skilled in both residential roofing and solar, like Becker Roofing and Exteriors, ensures a seamless project. Our project managers' services manage the entire process, and insurance often covers the costs associated with panel removal and reinstallation for a covered claim. Introduction You’ve made a smart investment in solar power, but what happens when the roof underneath your panels needs attention? For many homeowners in North TX, this question arises when their roof reaches the end of its life or suffers storm damage. Replacing a roof with an existing solar array is more complex than a standard project. It requires careful coordination and specialized skills to protect both your home and your energy system. Understanding the right way to manage different roofing materials and solar technology is the key to a successful project. Understanding Roof Replacement with Solar Panels When your home has a solar system, a roof replacement becomes a two-part project. It’s not just about shingles and underlayment; it’s about carefully detaching and resetting your valuable solar energy equipment. This process demands a team that understands both roofing and solar technology to avoid damaging your panels or voiding their warranties. For Keller homeowners, this means you can't hire just any roofer. You need professionals who offer roofing services that include a clear plan for managing your solar panels. The process involves a detailed inspection, safe panel removal, roof replacement, and finally, precise reinstallation to ensure your solar system functions perfectly. Why Roof & Solar Panel Integration Matters for Homeowners Your solar panels are a significant solar investment, and protecting them during a roof replacement is crucial. Handling a solar setup improperly can lead to cracked panels, damaged wiring, or a less efficient system upon reinstallation. A specialized contractor ensures every component is disconnected, stored, and reinstalled according to manufacturer specifications, safeguarding your system’s performance and longevity. Furthermore, the integrity of your new roof depends on correct panel reinstallation. In almost all cases of full replacement, panels must be removed. Attempting to work around them can compromise the new roof, leading to leaks around the mounting hardware. Proper integration ensures your roof is watertight, preserving your home’s structure and the aesthetic appeal of your solar array. Ultimately, hiring a team that masters both roofing and solar provides complete peace of mind. You can trust that your home is protected and your commitment to energy efficiency is preserved without the stress of coordinating multiple contractors or worrying about potential damage. Common Reasons for Roof Replacements with Existing Solar Panels Even with solar panels, your roof is still exposed to the elements and natural aging. Many homeowners find they need roof repair services or a full replacement for reasons that have little to do with the panels themselves. Understanding these common causes can help you plan for your residential roofing needs. The most frequent reasons for a roof replacement under solar panels include: Storm Damage: High winds, hail, and falling debris common in Texas can cause significant damage that requires a new roof. Roof Age: Most roofing materials have a finite lifespan. If your roof was already several years old when you installed panels, it may be time for a replacement. Material Failure: Over time, shingles can curl, crack, or lose their granules, and underlayment can degrade, leading to leaks. Leaks under solar panels often stem from failed flashing around the panel mounts or from pre-existing roof issues. Regular inspections and standard maintenance are vital, but sometimes a replacement is unavoidable. When that time comes, addressing the roof and panels together is the most effective approach. Step-By-Step Process: Roof Replacement & Solar Panel Removal A successful roof replacement with solar panels follows a precise, multi-stage plan. The first step always begins with a thorough inspection of the job site, including your roof and the solar array. This allows us to create a detailed strategy for a safe and efficient solar panel removal before any roofing work begins. We manage the entire process to ensure a smooth transition from start to finish. Once the panels are safely removed and stored, our team proceeds with the full roof replacement. After the new roof is installed, we reinstall the solar panels, ensuring every connection is secure and your system is ready to generate power. Safe Solar Panel Removal & Protection Procedures Safely handling your solar panels is our top priority. The process requires more than just unbolting hardware; it demands the expertise of a trained solar installer or technician. Our team methodically disconnects the electrical wiring, labels each component for accurate reinstallation, and carefully detaches the panels from their mounting racks. We follow strict safety protocols at every job site to protect both our crew and your property. Key procedures include: Using specialized tools designed for solar panel handling to prevent scratches or damage. Adhering to all fall protection requirements to ensure a safe work environment on your roof. Once removed, the panels are securely stored away from the work area. This attention to detail ensures that when we reinstall them on your quality roof, you get the most efficient possible solar power system, just as you had before. Having a specialist handle this is essential to protect your system's warranty and function. Timeline: What to Expect During Roof Work A roof replacement involving solar panels naturally takes a bit longer than a standard roofing project. The extra steps of removing and reinstalling the solar array add time, but our decades of experience in the Fort Worth metroplex help us streamline the process. A typical project can often be completed in three to five days, depending on the size of your roof and solar system. After our thorough inspections, we provide you with a clear timeline so you know exactly what to expect. While we perform our roof repair services, we work efficiently to minimize disruption to your daily life. Our goal is to get your home protected and your solar panels back online as quickly as possible. Here is a general outline of the project timeline:
By 7064529413 September 23, 2025
2025 Essential Fall Roof Cleaning Tips for Keller Texas Homeowners
June 30, 2025
How to Spot Hail Damage on Your Roof: Key Indicators
June 18, 2025
Texas Heat Roof Damage: Understanding Long-Term Effects
June 16, 2025
DFW Hailstorm 2025: Historic Storms North TX
June 12, 2025
Installation & Maintenance Guide for Roof Dryer Vents in North TX
June 11, 2025
Best Roof Dryer Vent Options for Keller Homeowners